

Comparing casual smartphone videos to material from a professional filmmaker is a world of difference. Most people think that the magic lies in the expensive equipment these people use. But let us tell you that the person behind the camera has by far the biggest influence for making smartphone videos look cinematic.
Even if all you have is a smartphone, it’s totally possible to achieve impressive looking video material for no to very little costs - The only catch? You do, in fact, need a smartphone. Sorry, we couldn't find a workaround for that one.
It doesn’t even matter which operating system (Android, iOS, etc…) you use - because these tips are the bread and butter to every filmmaker.
In this article, we will give you a 10 quick and easy tips you can use immediately to turn your smartphone videos into a movie like experience.
Roll the footage!
1. Clean Your Camera Lens
No, really. We mean it. It sounds almost too obvious, but it's one of the most common mistakes people make.
Your phone spends a lot of time in your pocket or bag, collecting fingerprints, dust, and lint. A tiny smudge can make your footage appear soft, hazy, or washed out.
Before every shoot, simply wipe your lens 2-3 seconds with a microfiber cloth or even the corner of a clean T-shirt if that's all you have.
It takes just a few seconds and avoids drastic image quality deterioration.
2. Set ISO and Shutter Speed for a Cinematic Look
How to set the shutter speed?
Shutter Speed defines how long the image sensor is exposed to the light. The longer the shutter speed, the brighter the image and vice versa.
But when shooting videos, the shutter speed is not primarily used for setting the brightness. A nice effect is also the motion blur it creates.
The longer the shutter speed, the stronger the blurriness of motions when filming - making them look smooth and seamless. Shorter Shutter speeds create way sharper single images, making motions look harsh and abrupt.
For a natural cinematic look, filmmakers refer to the 180° Shutter Rule. This guideline suggests setting your shutter speed to approximately double your frame rate.
24 fps → 1/48s
25 fps → 1/50s
30 fps → 1/60s
50 fps → 1/100s
60 fps → 1/120s
This results in exactly the right amount of motion blur we know from most films.
ISO: Correcting Brightness Imbalance
Depending on the lighting, once you set your shutter speed, you might notice the frame is either too dark or too bright. To compensate this, we use the ISO setting.
ISO sets the sensitivity of the camera sensor to light.
The image is too bright? → Use lower ISO settings (e.g. 80 - 250)
The image is too dark? → Increase the ISO (e.g. 800 - 3200)
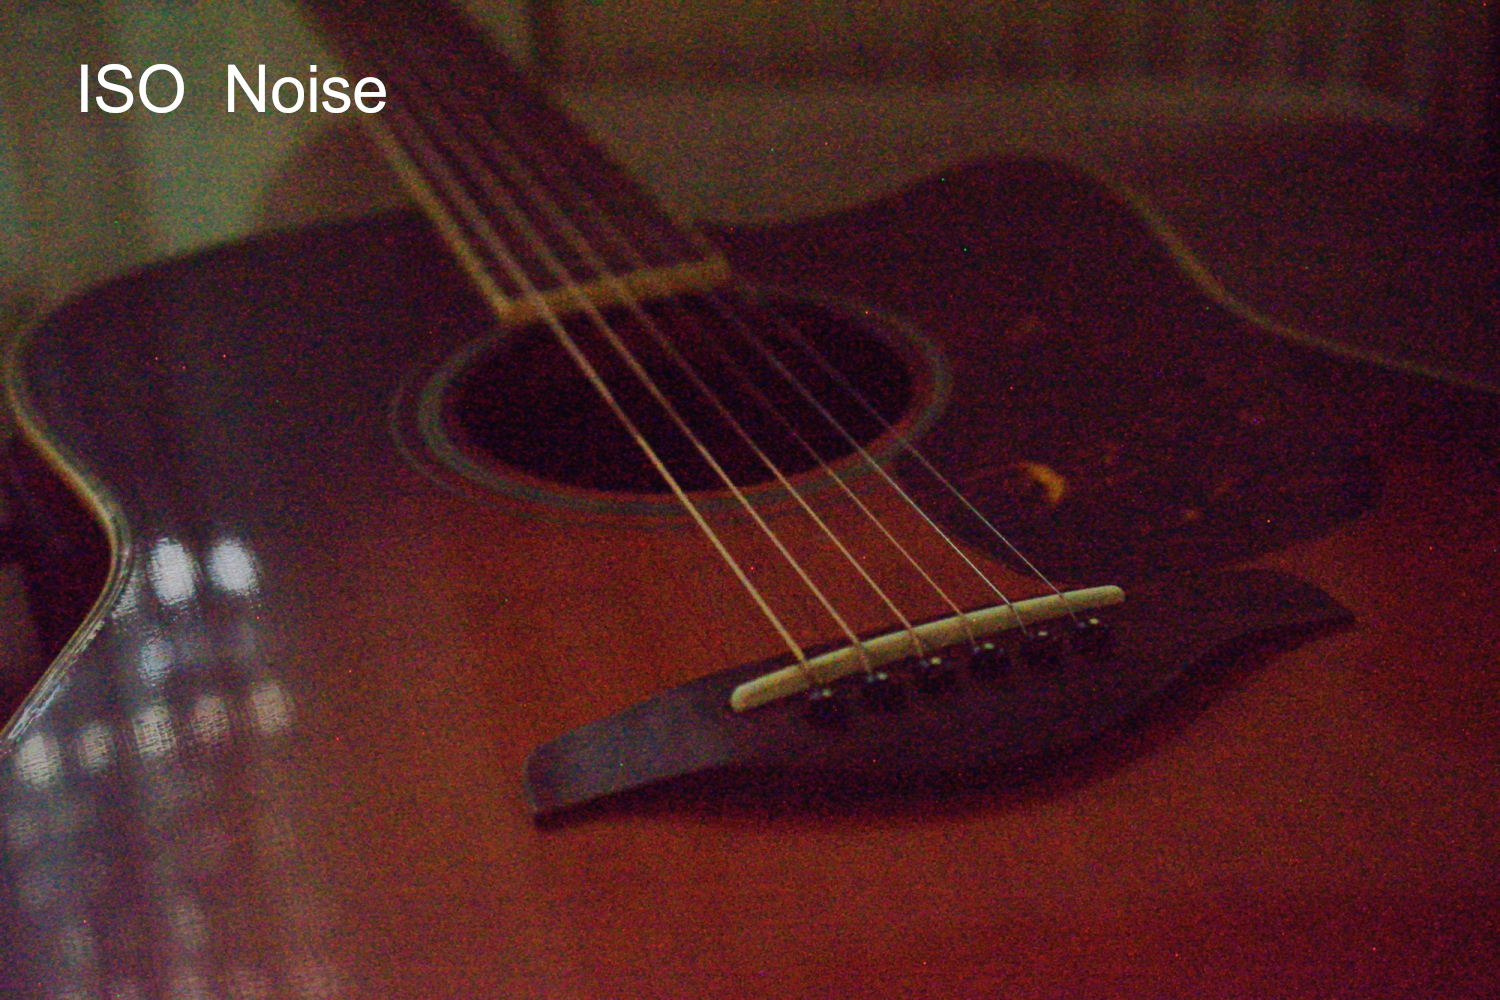
But be careful here. It always pays out to make sure you have enough light coming in, because if the sensor does not get enough light, it adds noise, reduces sharpness and the dynamic range. High ISO settings make the problem even worse by making those artifacts more noticeable.
To demonstrate this, here is a basic example of showing the noise introduced by bad lighting:
3. Set Quality and Frame Rate
Whenever possible shoot in 4K for maximum detail. When your phone does not support it, choose the highest resolution. We would suggest Full HD (1080p) for the absolute minimum.
Higher resolutions also give you more flexibility when cropping or stabilizing footage during editing.
Frame Rates and what they are used for
The frame rate has a big impact on how your footage will be perceived. Don’t believe it? Compare different frame rates and see for yourself.
Here is what you need to keep in mind to find the right frame-rate for your shots:
- 24 fps This is your frame rate to make your smartphones videos look like a movie. We perceive footage in 24 fps as “cinematic” because that's what we've been trained to associate with movies for over 100 years. It also adds a decent motion blur, which makes your content more emotional. If your smartphone does not support shooting in 24fps, choose a higher fps. You can lower it later using video editing software.
- 30 fps: If you prefer that “casual” and real look, this is your setting. More and more successful movies are characterized by this feel and it’s an interesting alternative to standards 24fps shots. 30fps feel more similar to natural human perception, because it preserves more temporal information and smoother motion.
- 60 fps: Only when you plan to create smooth slow-motion shots. When you time-stretch this footage later to half-speed you would end up with a slow moving video with 30fps, which provides a smooth motion.
4. Use Natural Light Whenever Possible
Lighting is far more important than camera quality.
Even the latest smartphone will struggle in poor lighting, while almost any phone can produce beautiful footage in good light.
Some simple tips:
- Film during the golden hour (shortly after sunrise or before sunset) At the “golden hour” its still bright enough to film clean and detail-rich footage plus at this time, the light is especially smooth.
- Position your subject facing the light Filming against the light makes your footage loose so many details. Extreme brightness differences within a single image are difficult for any camera to handle and often require heavy adjustments, turning your subject into a black void. Have you ever tried making a selfie with the sun right behind you? Yep… that’s why.
- Avoid harsh midday sunlight whenever possible. Eyes become dark, noses cast long shadows, and faces lose detail. Smartphones have a limited dynamic range compared to professional cameras. They struggle to capture both very bright and very dark areas at the same time, often forcing you to sacrifice one or the other.
- Use open shade for softer and controlled lighting. Open shade is an area that's protected from direct sunlight but still illuminated by the bright sky. The open sky acts like a giant natural softbox.
Filming at night or in a room? Check our blog article on how you can create the perfect cinematic lighting yourself!
5. Keep Your Shots Stable
Shaky footage is not necessarily a bad thing. It depends on how spontaneous you want your footage to be perceived. But when it comes to a elegant cinematic look you want every movement to be controlled.
To keep your footage stable, walk slowly and bend your knees when moving. Keep your elbows close to your body or lean against a wall for extra stability.
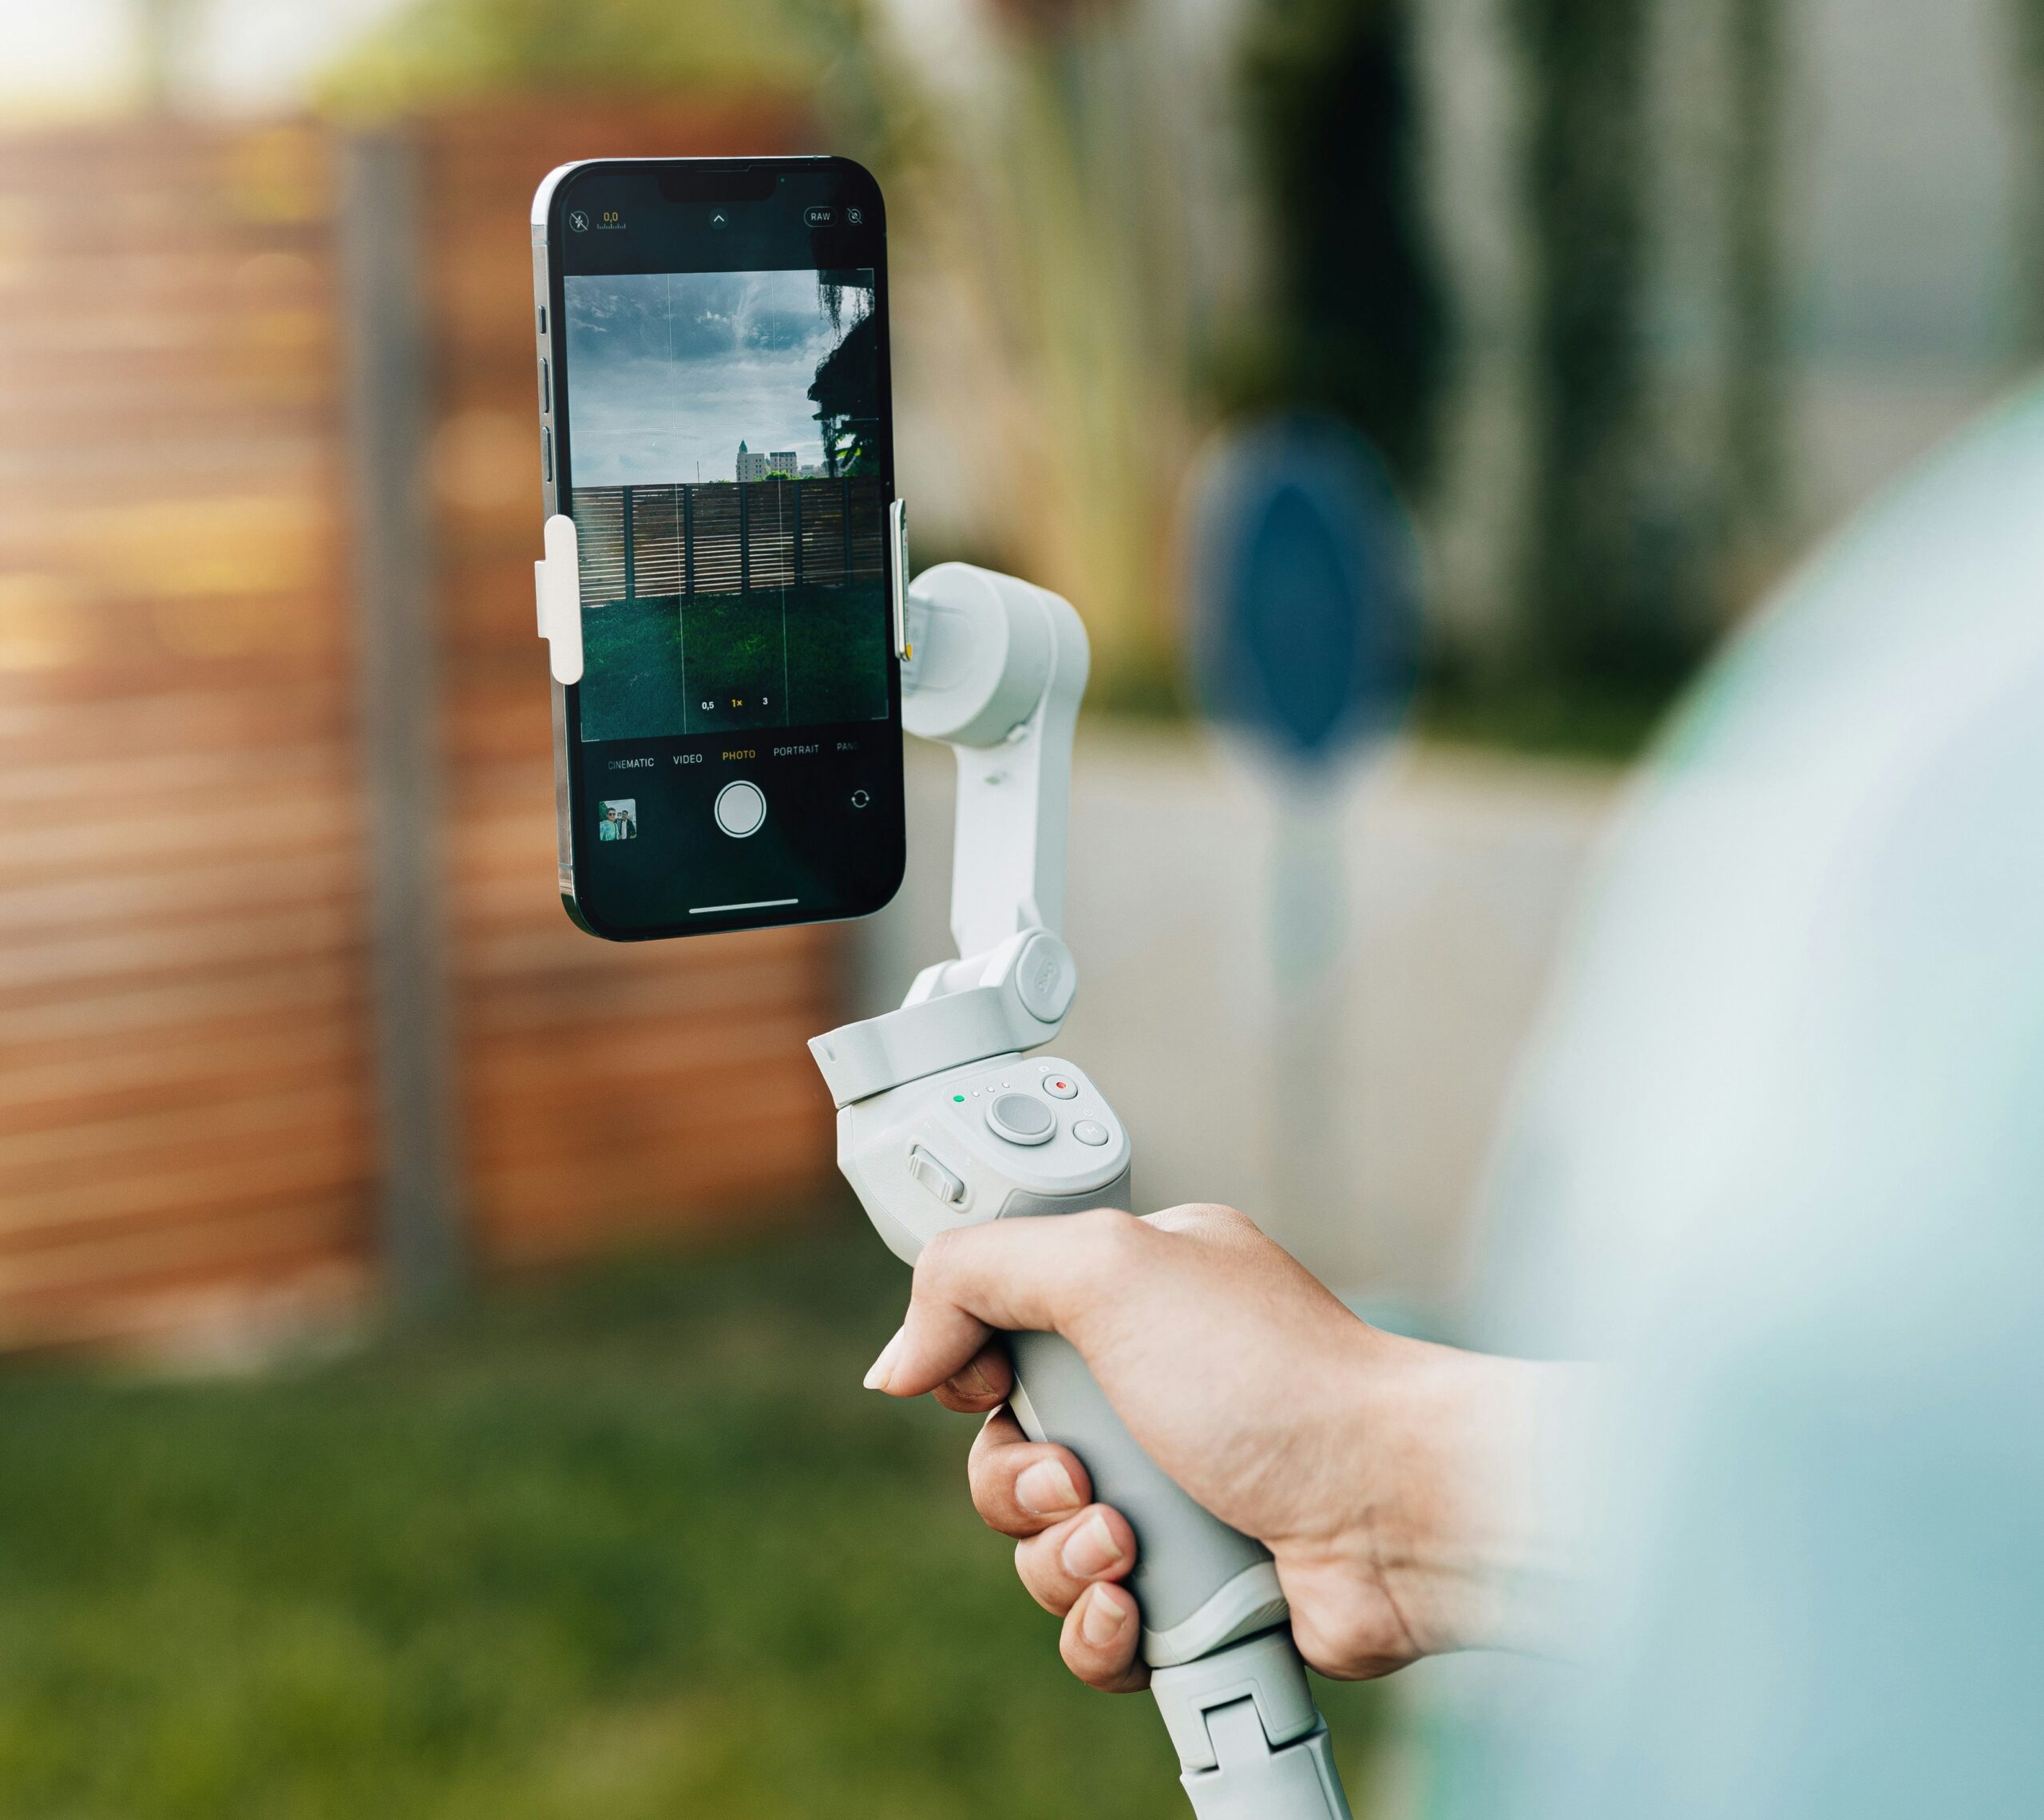
If you want your footage to be fully controlled, there is no way to get around tools like Tripods or gimbals. While lower end gimbals start at 50$, tripods for static shots are much cheaper and you can get pretty decent ones starting at around 15$.
6. Composition
The rule of thirds
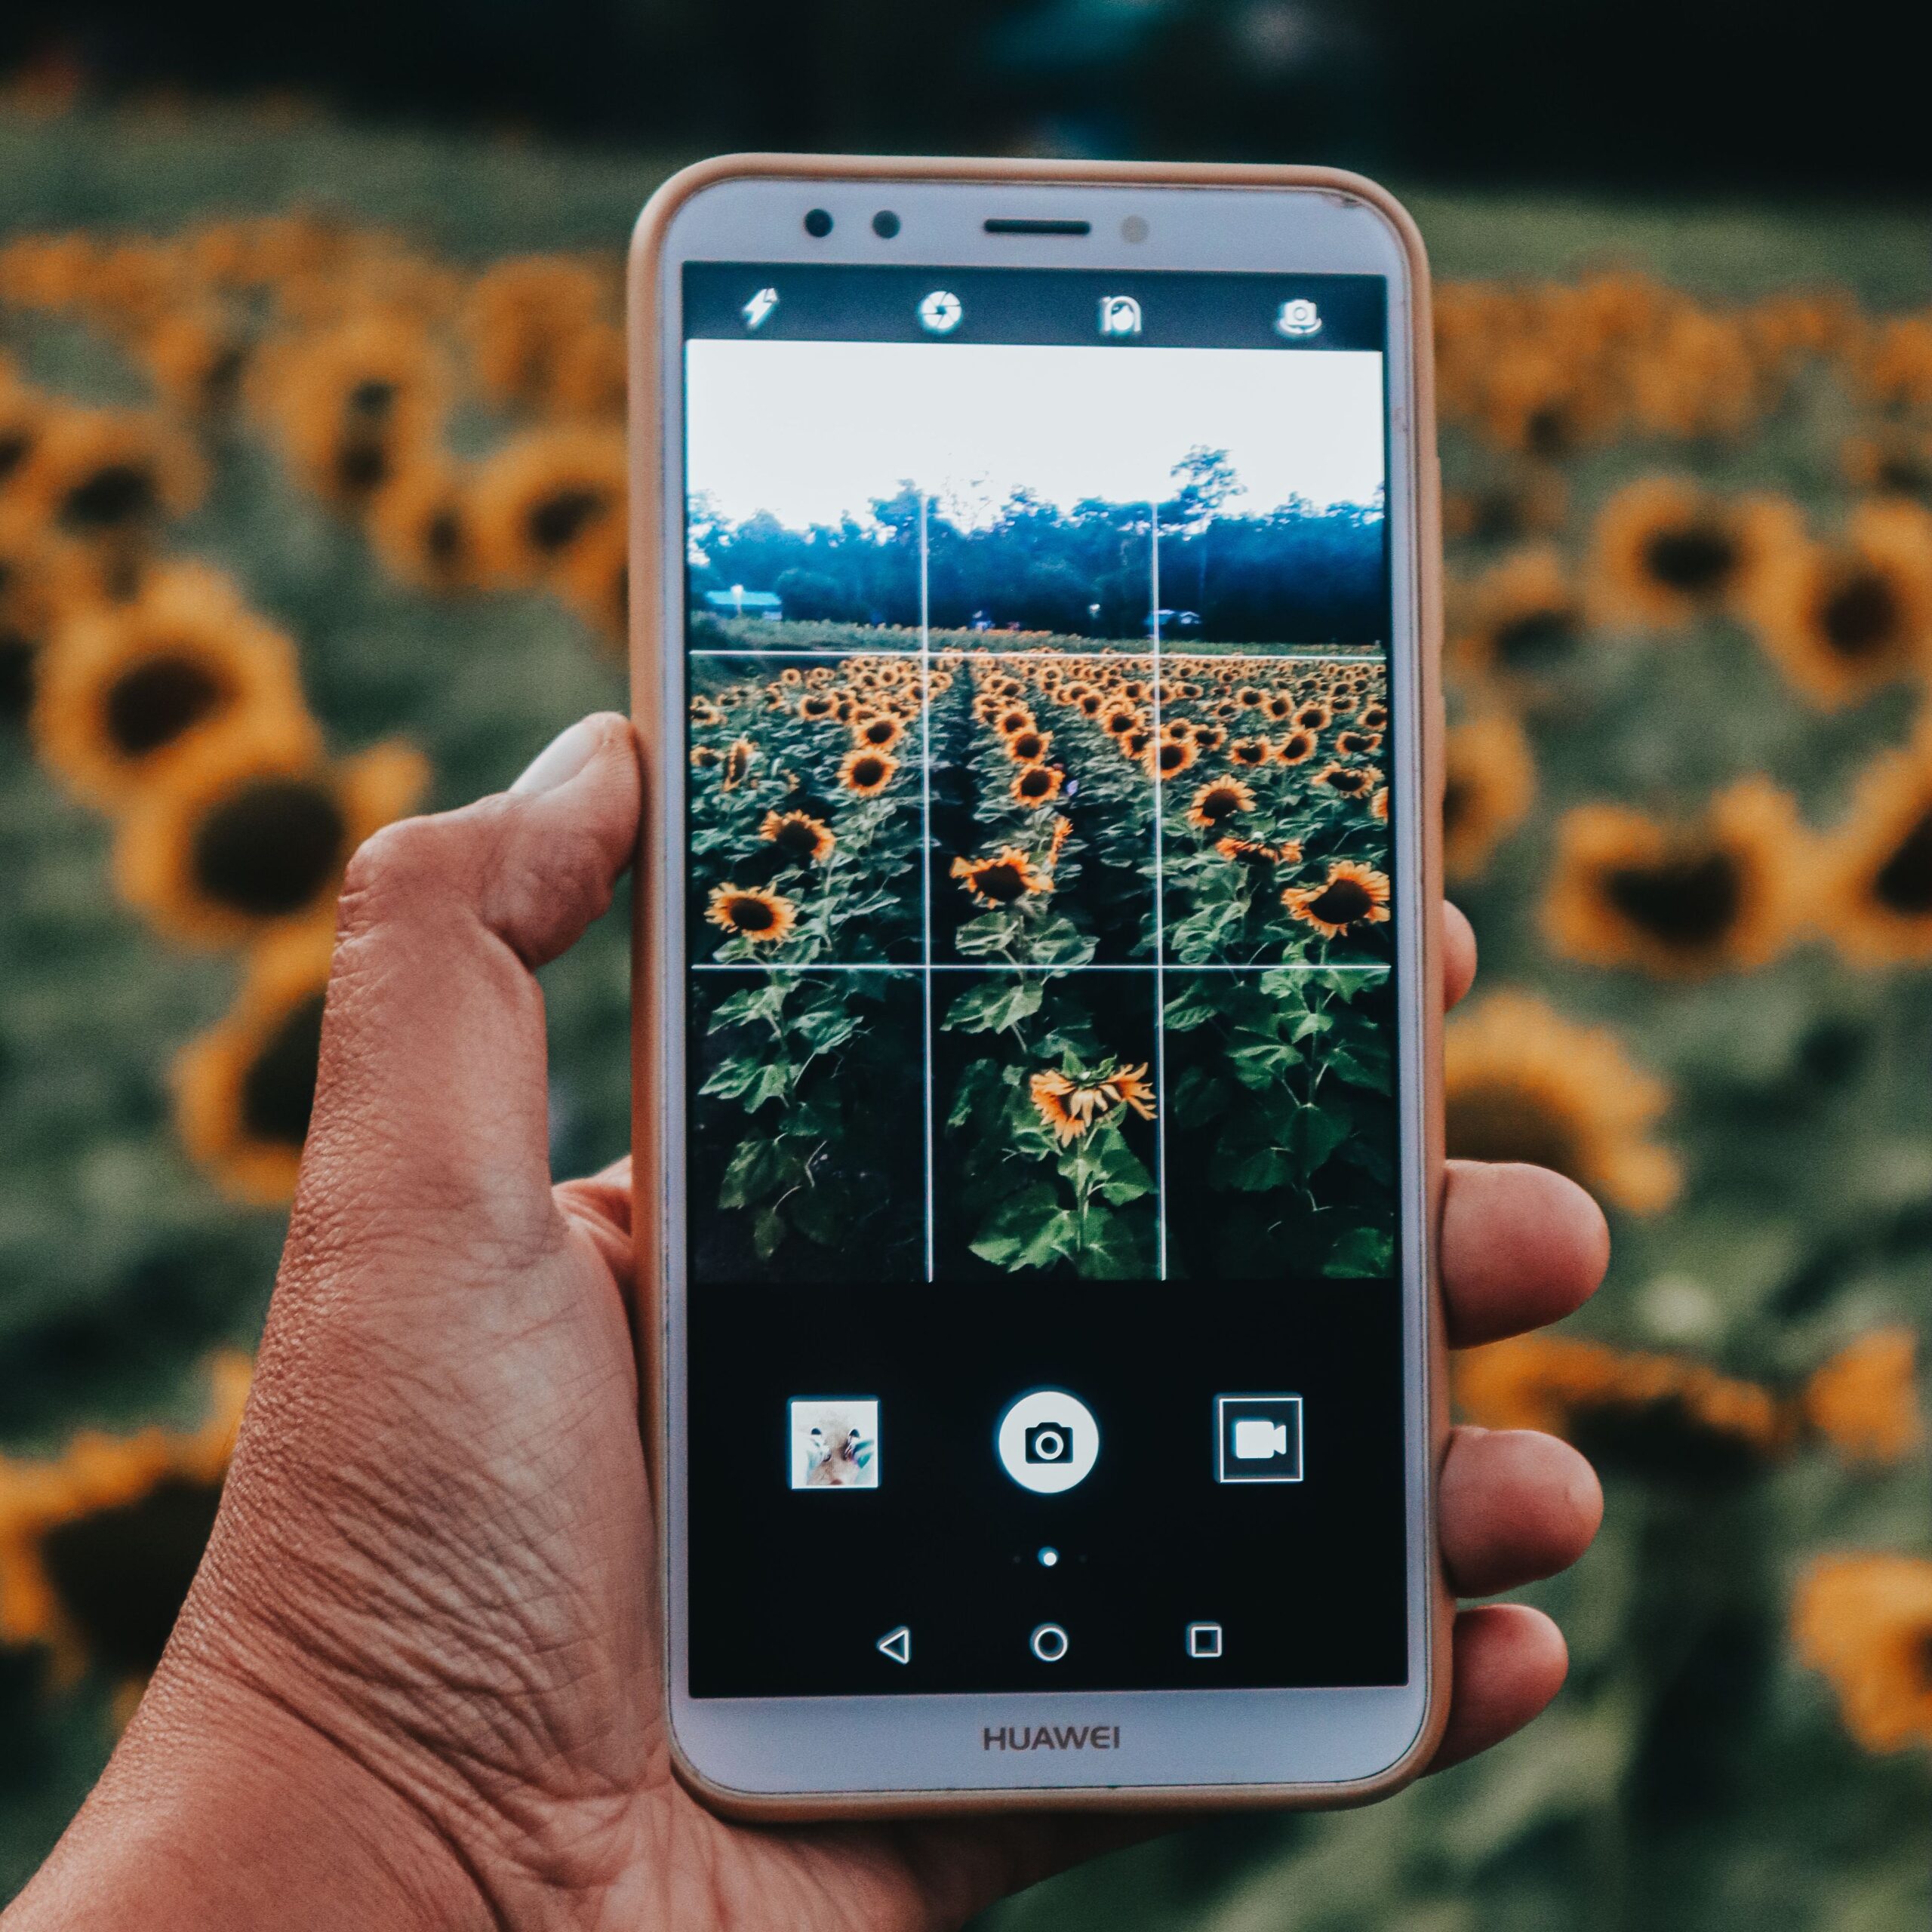
For static shots, the rule of thirds, helps filmmakers and photographers placing the objects. It basically divides divides the frame into thirds horizontally and vertically. This is because our eyes follow distinct patterns when looking at a frame it moves along the grid lines, highlighting elements at their crossing points.
When a subject is placed exactly in the center of the frame, the image often feels calm and balanced—but sometimes also static or uninteresting.
Moving the subject to one of the imaginary rule of thirds grid lines or one of their crossing points creates a subtle visual imbalance. This adds visual interest without making the composition feel chaotic.
Leading lines
While the rule of thirds defines where to place your main object or character, leading lines literally “lead” the viewers eye directly to it. Leading lines often give an image a sense of direction and movement, while the rule of thirds provides balance and visual tension.
Leading lines can be obvious, like roads, railway tracks, a row of plants, fences, rivers, or bridges. They can also be more subtle, such as the edge of a building, a row of trees, shadows, waves, or even a person's gaze.
For example, imagine photographing someone standing on a long pier. The edges of the pier naturally lead the viewer's eyes directly to the person, making them the clear focal point of the image.
Symmetry
Symmetry works differently. Instead of creating tension through imbalance, it creates harmony, structure, and visual satisfaction. Placing elements symmetrically emphasizes leading lines and focal points even further. A symmetrical image could be:
- A perfectly centered building.
- A reflection on a calm lake.
- A person standing in the middle of a symmetrical hallway.
Symmetrical placement of objects make your shots satisfying to look at and feel “complete”.
Leading Lines guide the viewer, the Rule of Thirds creates visual tension, and Symmetry provides balance and structure.
7. “Show, Don’t Tell!”
Let's make one thing clear: your video should regularly give viewers something new to look at. Instead of showing the same camera angle from start to finish, mix A-Roll and B-Roll footage to add visual variety, reinforce what you're saying, and keep viewers engaged.
As a cinematic videographer you have two jobs:
- Tell the story from beginning to end → A-Roll Footage (linear, informative)
- Create emotions and atmosphere → B-Roll footage (creative and emotional)
When making videos, you always have to deliver at least one message, the main action. Making your smartphone videos look cinematic is the same as saying: make them more emotional.
B-Roll footage makes your videos more interesting to watch and so much more enjoyable. When you look into the camera talking (The “A-Roll”), try blending in some “B-Roll” footage from time to time while you keep speaking.
Ideally, B-Roll shots complement what you are talking about. These shots could be:
- Close-up Shots: Pouring your coffee in a mug, Hands, instruments, buttons, displays
- Macro Shots: Small details captured with a shallow depth of field
- Wide Shots: Show the entire environment or scene
- Overhead Shots: Filmed from above, often showing a workspace or setup
- Tracking Shots: The camera moves along with the subject
- Reveal Shots: A subject or scene is slowly revealed to the viewer
- Slow Motion: Emphasizes movement and emotion
- Establishing Shots: Show the location or setting where the action takes place
This interplay of A-Roll and B-Roll is what makes your smartphone videos more cinematic. Try it out!
8. Color Grade for a Cinematic Look
Raw smartphone footage often times look flat.
Filmmakers often use color grading to create a specific mood and make all shots feel visually consistent. To get access to color grading tools, we recommend using CapCut. It’s free to use and the color grading freedom you have without any paid membership is more than enough.
In most cases, a cinematic look comes from subtle adjustments:
Reduce Saturation
Many smartphone cameras automatically boost colors to make images look more "eye-catching." Reducing saturation slightly can often create a more natural, film-like appearance.
Color Balance Changes the Mood
Think of the color balance as being the underlying message of your footage:
- Warm tones (orange, golden colors) can create a feeling of happiness, nostalgia, or comfort.
- Cool tones (blue, teal colors) can create a feeling of mystery, sadness, or tension.
- Muted colors often create a more serious or cinematic atmosphere.
Color grading is one of the most important things which can make your smartphone videos look cinematic. If you want to learn more, Anthony Gallo from the channel Content Creators, explains it beginner friendly:
Keep Your Footage Consistent
If your video contains multiple clips, make sure they have a similar look. A scene where one clip is warm and another is cold can feel distracting and unprofessional.
Most smartphone editing apps already include basic color tools.
Apps like DaVinci Resolve, Premiere Pro, or Final Cut Pro offer more advanced controls if you want to take your videos further.
Keep in mind: Color grading cannot fix poor lighting or bad composition!
9. Use Music to Create Emotion
Music changes how your smartphone videos are perceived big time. Our huge library of cinematic music gives you the perfect place for expressive, aesthetic and dynamic sounds to support your visuals.
For aesthetic and meaningful visuals, choose music which expresses warmth, intimacy and detail, such as your shots:


If your video calls for a more tranquil and reflective atmosphere, choose music that is less melody-driven and functions more like a subtle soundscape or ambient pad:

Shots showing the beauty of nature benefit from cinematic acoustic tracks:

No matter what your topic is, feel free to browse our royalty free cinematic music for to make your smartphone videos not only look but feel like a movie.
All of our tracks are composed in-house by our talented team of world-class artists. Always safe to use and exclusive to HookSounds.
10. Edit with Intention
Editing is where your story comes together. Keep your edits clean and purposeful.
Here are a few simple rules:
Remove unnecessary pauses
Long pauses, awkward moments, or clips where nothing important happens can slow down your video and make viewers lose interest. Don't be afraid to cut aggressively. A shorter, more focused video usually feels more engaging.
Cut on movement for smoother transitions
One of the easiest ways to create smoother transitions is to cut while something is happening.
For example:
- Someone starts opening a door → cut to the door opening from another angle.
- A person begins walking → cut to a new shot while they are still moving.
- A camera moves toward an object → transition into a closer view of that object.
Because the viewer's eye is already following the movement, the cut feels natural and less noticeable.
Match the rhythm of your edits to the mood
That’s a super important tip. If your edits tell the opposite of what you trying to express, the whole video becomes hard to watch and understand.
- Fast cuts creates energy, excitement, or a sense of urgency.
- Longer shots and slower camera movements feel calm, emotional, or cinematic.
- Slow Motion work especially well for B-Roll footage.
Let the mood of your video determine the pacing rather than cutting every clip at the same length.
Avoid flashy transitions
Modern editing software offers countless transitions, but most professional videos rely mainly on simple cuts without any transitions. Fancy, flashy transitions can quickly distract from your story and make your video feel amateurish.
Summary: Your Cinematic Checklist
With the incredible technology built into our smartphones today, you don't need fancy or expensive equipment to achieve impressive footage.
Recreating the true cinematic look of Hollywood films still requires extensive expertise, high-end cameras, and professional lighting, but with our tips, you have a good starting point to make your smartphone videos look as cinematic as they can be.
Before pressing record, quickly ask yourself:
- Is my lens clean?
- Does the shutter speed support fit the movements?
- Is the Image to bright or too dark? → ISO!
- Am I shooting in the right resolution and frame rate?
- Is the lighting soft and natural?
- Is my shot stable?
- Have I composed the frame carefully?
- Do I have a mix of wide, medium, and close-up shots to keep the scene interesting?
- Do I have access to HookSounds awesome cinematic music?
- Is this shot relevant for telling the story or locking in the emotion?
- Are my transitions and shots clean and non-distracting?
If you can answer "yes" to these questions, you're already ahead of most smartphone videographers.