

Why Does Music Trigger Emotions?
Do you want to make really cool videos with transitions, titles and sound? How do you put everything together? Video editing might seem like a really complicated task (and yes, it has its own difficulties) but starting might be simpler than you thought! And we are here to help you in the process, so don’t worry about it! Whether you want to know how to edit videos on YouTube or how to edit videos on your phone or how to edit videos for TikTok, this is the ideal tutorial! So keep reading.

Best Video Editing Software
There are lots of video editing software for Windows and for Mac out there, you can get some of them for free and some of them require a license. However, almost all video editors have a similar structure, usually, timeline-based, and if you are struggling to choose one, you can take a look here and check the best video editing software out there.
Adobe Premiere Pro is definitely one of the best options in the market, you can go for a free trial, and it will definitely help you edit videos like a pro. A free and simple option for all Apple users is IMovie which is very friendly and simple to use, but it might be missing some useful tools. What is great about IMovie is that you can edit videos on your iPhone too!
For this video, we’ll be editing with Adobe Premiere Pro, but don’t worry, as we said before, all video editors are pretty similar so you won’t have a problem.
Why Is Video Editing So Important?
Have you ever watched a long movie but it actually seemed like time flew by? That’s the art of good storytelling and good editing. Through videos, you can connect with your audience in a different way because music and video combined plus good editing keep the brain entertained. So if you are a content creator, being able to communicate your ideas through your videos is an amazing way of connecting with your audience. That’s why YouTube is so popular nowadays and that’s why all content creators are making their own videos. So what are you waiting for?
Where Do I Start?
Whenever you are recording a video, you must think ahead and have in mind what you want your video to look like. So different camera angles and different shots are important as well as knowing what you want to communicate. Organization is key! You should also have in mind your camera recording settings, 720p or 1080p are really good quality products for all platforms. Also, we recommend you get your footage organized once you stop recording, place them in different folders, and get the audio files organized too.
Once you have that ready, let’s begin to edit! So open your video editor and let’s get this project started.
How To Edit Videos Step By Step
Now that your video editor is open, let’s create a new project. And now let’s see what’s on the screen. Most editors are very similar, they will have a timeline, a panel where you can watch what’s going on on the timeline, a media browser panel and sometimes a different panel to preview what you’ve imported. So now, let’s start step by step:
How To Import Media
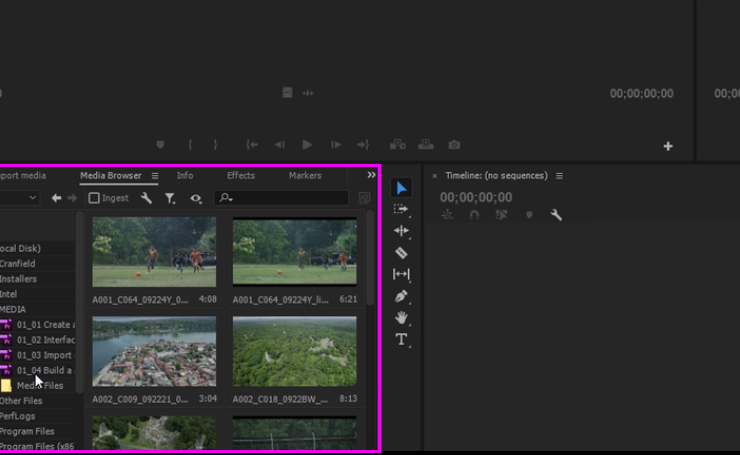
So the first thing we want to do is to get some media files into the project. In order to do so, on the bottom left we choose “media browser” and select the files we want to add to our timeline. With the right-click, you’ll select import. You can preview those files on the top left pane, which is called the source panel.
How To Add Files To Timeline
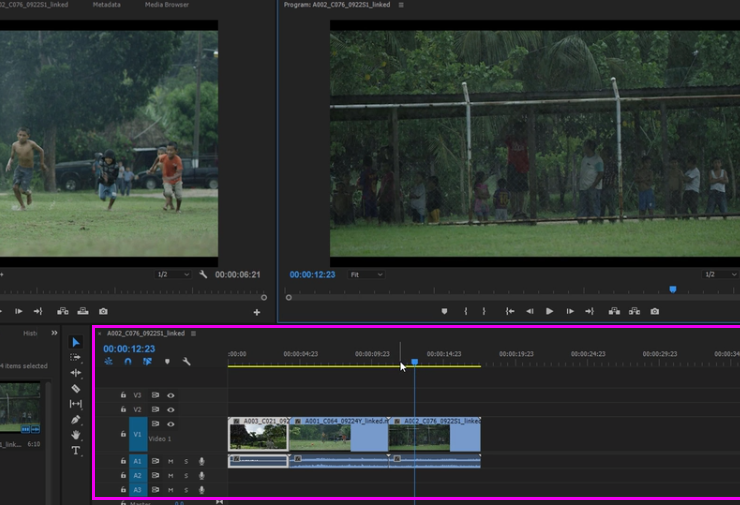
To add those files to the timeline (this is where you’ll edit your project and where you can also add music and titles), you can drag them from the media browser to the timeline at the bottom right. They’ll be added in the order you select them. As you can see, on the top right panel you will preview everything that is on the timeline.
The timeline is super important to develop your project. On the top of it, you can see some numbers which indicate the passage of time. Then, you have the files you added with their respective audio file. If you click on the numbers on top, you will see a blue line that moves to wherever you click, that is the player and it indicates the frame you will be previewing.
How To Trim Video
Okay, so in the last two steps we got the hang of the video editor and we also learned to import files, it wasn’t too difficult, right? Okay, so let’s move on to editing now!
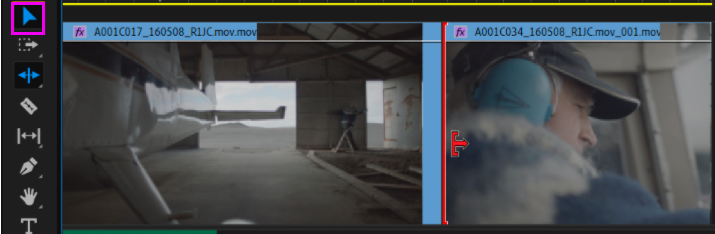
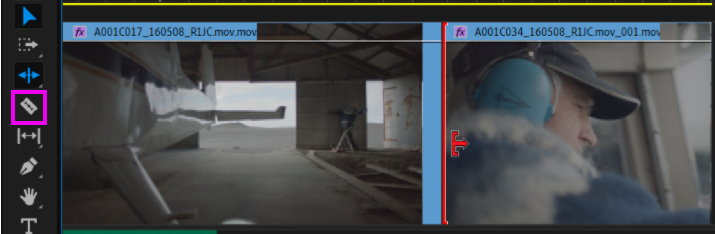
After you have a few files on your timeline, there are a few tools that can help you out. One of them is the selection tool which allows you to move the selected file or shorten it. You’ll notice that when you hover over the beginning or the end of a file, you’ll see that it turns into a red bracket with an arrow, this allows you to trim your video. That way you will have a clip of the length that you want.
You can also use the razor tool to make cuts in your video and then, with the selection tool, you can delete the parts that you don’t want. You can also make cuts on your timeline so there are no black frames between the clips. Not that hard, right?
How To Add Music To Video
Music is essential to any project you’re working on. So if you want to add music to your project, you’ll have to import the audio files first, just like you previously did with the video files. You can play the audio files and listen to them or you can drag them and drop them to the timeline. Notice that the audio files are always below the video tracks. Then with the selection tool, you can trim the audio clip just like with video files.
If you are a content creator, remember that YouTube and other social media platforms have a strict policy when it comes to music. So we recommend that you choose Royalty-free music sites, like HookSounds, that provide high-quality audio tracks for your videos. You can learn more about it here.
How To Add Titles To Video
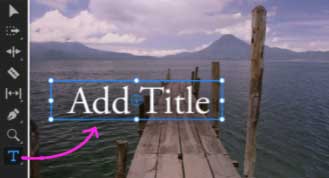
Adding a title to your video is really easy and quick! You just have to go to File > New > Title and a new window will open. There, on the bar at the left, you’ll have all kinds of tools to create your personalized title, whereas on the right side you’ll find tools to make adjustments. Once you are finished, you’ll see the titles on the bottom left panel and you just have to drag them and drop them to the timeline. There, with the selection tool, you can change the duration of the titles as you wish.
Other editors, like IMovie, have a special tab called Titles where you can directly create and edit titles there.
How To Add Transitions
So, when you have two video files on the timeline there will be a cut between the two of them. And usually, cuts are quite good when editing, let’s not underestimate them. However, if you want to add other transitions, like for example a fade in or out, we’ll show you how.
At the top of your screen, go to Window > Effects. There, you’ll have different folders, you will choose Video Transitions where you’ll find all types of transitions for your project. Choose the one you like most and just drag and drop it to the video.
![]()
How To Export And Share A Video
So, you have finished putting everything together and now you want to share it for the world to see. What are the next steps? To export your video file you’ll have to go to File> Export > Media and a new window will open. There you’ll choose your settings, you can choose the format of the list that suits you best, format H.264 is a popular codec for distribution of media, and the preset should be Match Source - High bitrate and then click Export.
If you want to share your video on social media, you’ll have to do the same procedure we previously explained but choose the Publish tab instead. You should be able to choose the social media you want your project to be published and that’s about it!
If you need to convert your video and reduce the size of your videos without losing quality, you can always use a video converter for mac.
Once you explore your video editor a little further, you’ll learn new things. But for now, we hope that this quick tutorial has helped you with your project. Video editing isn’t that bad, huh?

